Threaded Stud with Flange (PS)
International Standard ISO 13918
Welding Stud
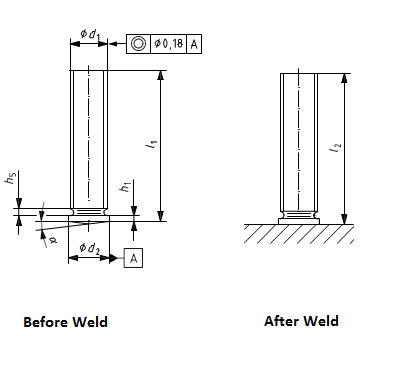
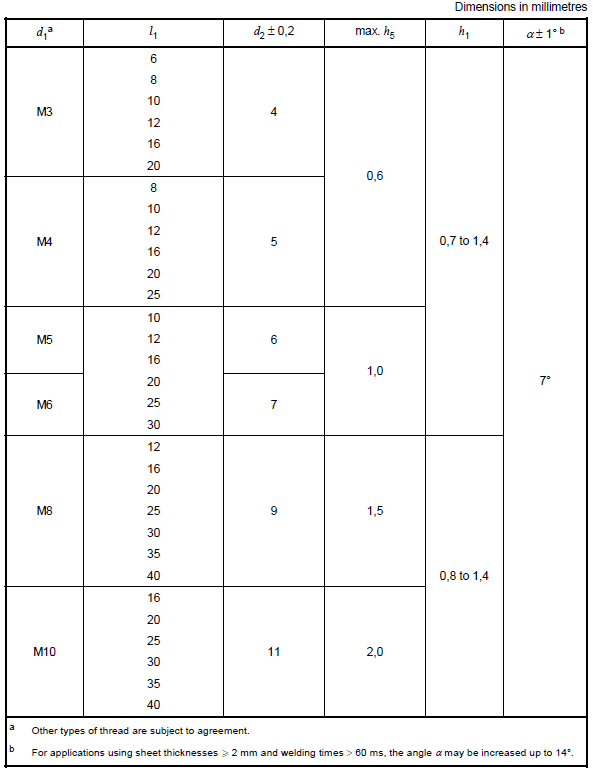
Nominal dimensions are listed. The tables divergence in outline shape, finish or dimensions shall be permitted, provided the welding area complies with the specifications of the said tables.
The length after welding, l2, is a design value. By proper control of the welding it is possible to keep variations in l2 to within ± 1 mm. Under special conditions, l2 may be constantly different from the nominal value.
The form of the central part of the stud tip comprised inside the diameter d1/3 for stud types UD, SD (d2/3 for stud types PD, RD, ID) shall be at the manufacturer’s discretion. The tip shall be at the manufacturer’s discretion in the case of flux in the form of a press-fitted aluminium ball (e.g. flattened in the centre with a
diameter not exceeding 0,5 d1).
Only logged in customers who have purchased this product may leave a review.


Reviews
There are no reviews yet.