Description
Unthreaded Stud (US)
Unthreaded Stud (US) – Welding Stud
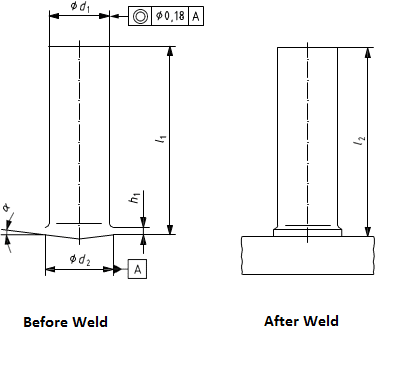
Nominal dimensions are listed. The tables divergence in outline shape, finish or dimensions shall be permitted, provided the welding area complies with the specifications of the said tables.
The length after welding, l2, is a design value. By proper control of the welding it is possible to keep variations in l2 to within ± 1 mm.
Not What You’re Looking For?
View our entire selection of ISO 13918 studs here!
Have Questions?
For more information on this product, call our office at 800-252-1919 or email us at Info@studweldprod.com and we will get back to you shortly!
Follow Us on Social Media!
Your #1 Stud! on Instagram and Facebook. Also, check out our YouTube channel here.


Reviews
There are no reviews yet.